Backoffice for Collections
Introduction
To populate a collection and edit existing items, you have to create a backoffice: a place to list all items and add/update/delete ones.
For every collection you create, you have to design:
- a custom widget to enter/display the content of each item
- a webinterface embedding a report widget to display the content of the collection + the above custom widget to add/update/delete items
In this tutorial we'll create a backoffice for the collection 'cars':
- Backoffice - Car - Web Interface
- Backoffice - Car - Custom Widget
Note:
The best practice is to create the collection in the MAIN project of your application and to put the backoffice in a separate ADMIN project.
The USERS of a project are able to read the content of the collections and are able to open the webinterfaces in the current project.
As only admins will be able to interact with the backoffice but everybody can read content of the collection, there must be 2 separated projects.
The MAIN project must be included into the ADMIN project.
Ex: the main application is a car order approval.
So the main project will be Car Order Approval - MAIN. This will contain the webinterfaces, the workflow processes related to the order and the collection cars.
There will be another project Car Order Approval - ADMIN containing the backoffice to manage the content of the collection, and including the Car Order Approval - MAIN project.
To sum up:
Car Order Approval - ADMIN: contains backoffice of the collection
Car Order Approval - MAIN: contains the collection
Behaviour of the backoffice
The goal is to display the list of cars (Backoffice - Car - Web Interface), and to be able to
- Add a new one (Add link)
- Edit or delete an existing one (pen & cross icon)
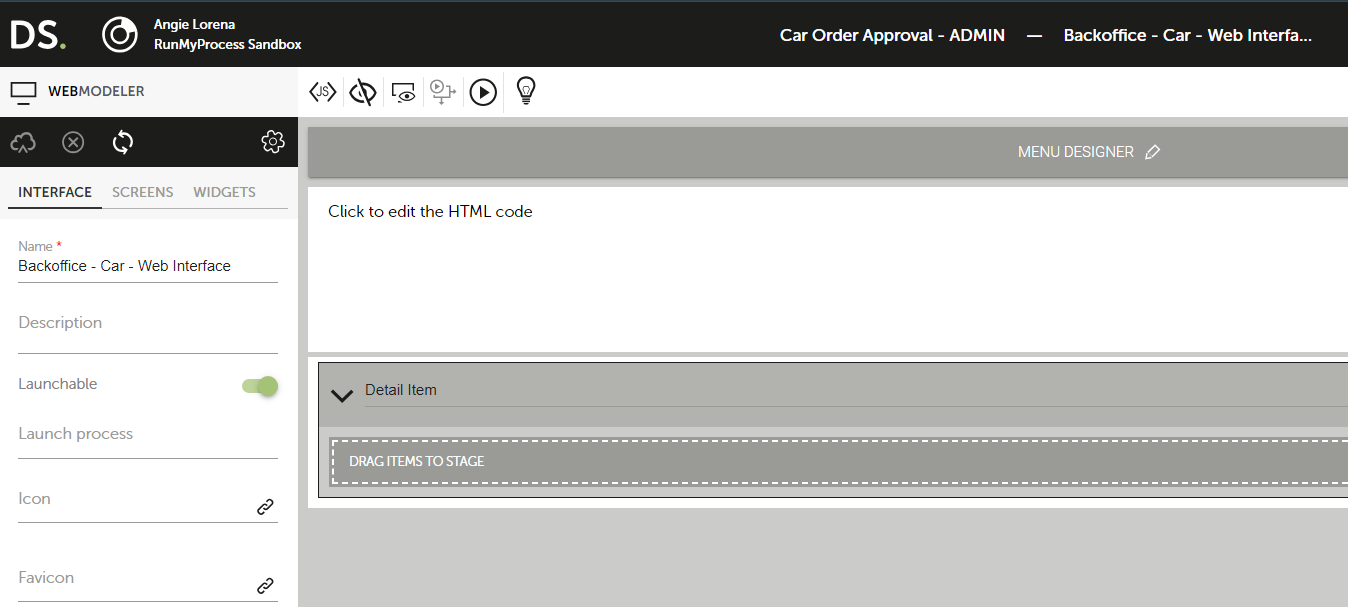
Backoffice - Cars - Web Interface will look like:
Create the collection
The best practice when you create a collection is to use only lower case characters and underscores, no special characters.
Here, we'll create cars collection, within the 'Car Order Approval - MAIN' project.
Be careful: as the collection name is used when you interact with collection using freemarker, you should NEVER change its name.
Create 'Backoffice - Car - Custom Widget'
Create Car brands list
As every car will be associated to a brand, let's create a custom list 'Car brands', within the 'Car Order Approval - ADMIN' project:
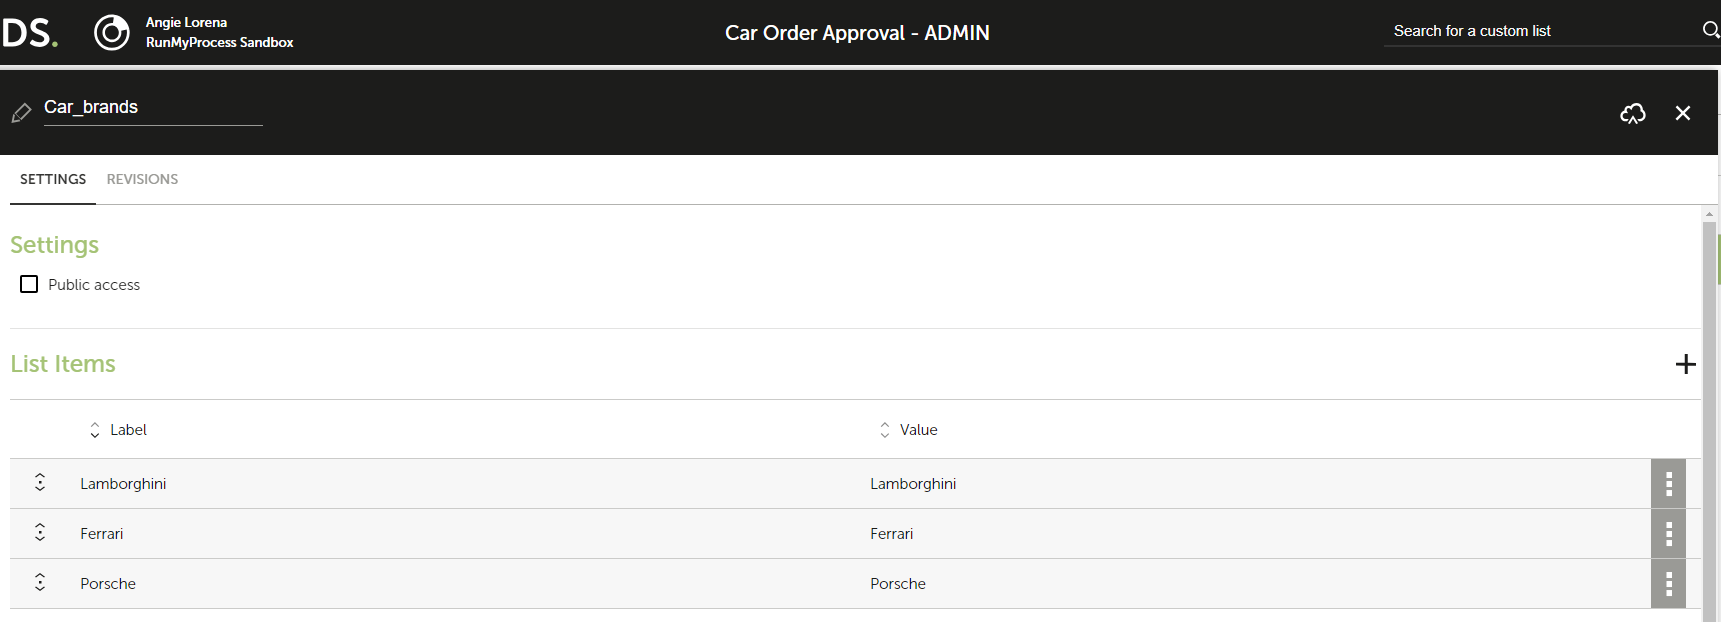
Note: do only use lower case characters and underscores for values
Create the custom widget
Now, create a new webinterface, name it 'Backoffice - Car - Custom Widget', select 'Custom widget', still within the 'Car Order Approval - ADMIN' project.
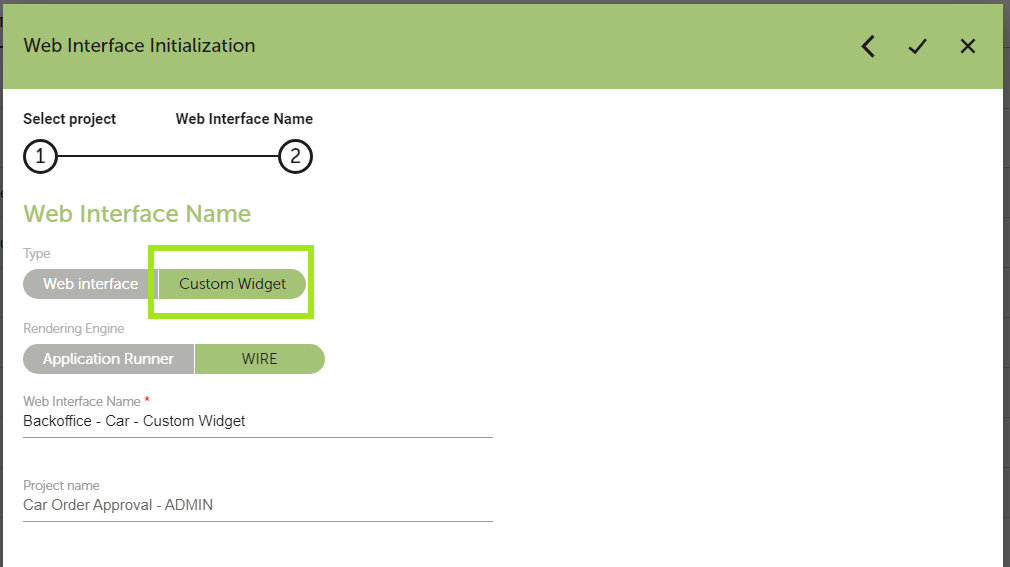
Note: a custom widget is a group of widgets you can reuse within any web interface
Go to Design tab and add the following fields:
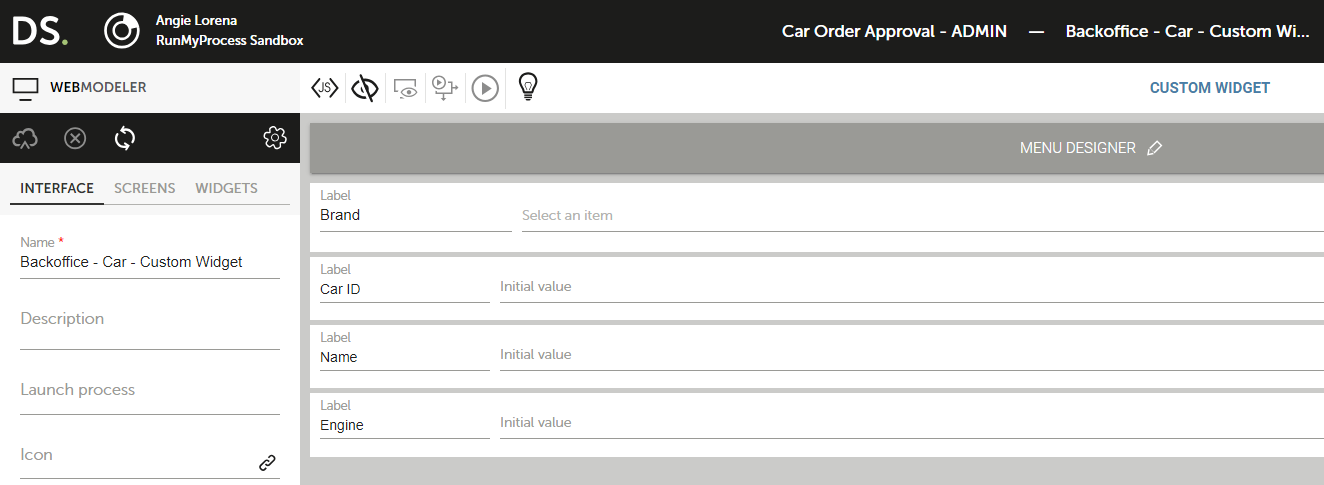
- Brand: List widget, type 'Custom list', where you'll choose the 'Car brands' list you've created before.
- Car ID: Text input widget (as it will be generated automatically and you don't want the user to be able to modify it, set it as hidden, in the 'Rules' tab of the widget).
- Name: Text input widget.
- Engine: Text input widget.
Note 2: When you create items in a collection, you have to choose a field as a unique ID to distinguish each item in the collection. This is what car_id is for. Whatever the way you add items (javascript, REST API, Freemarker), do ensure every ID is unique (in this example, we've created and used the RMPApplication.uuid() function to generate the id).
Save the custom widget.
Create 'Backoffice - Car - Web Interface'
Create a webinterface 'Backoffice - Car - Web Interface', type 'Launchable web interface', again within the 'Car Order Approval - ADMIN' project.

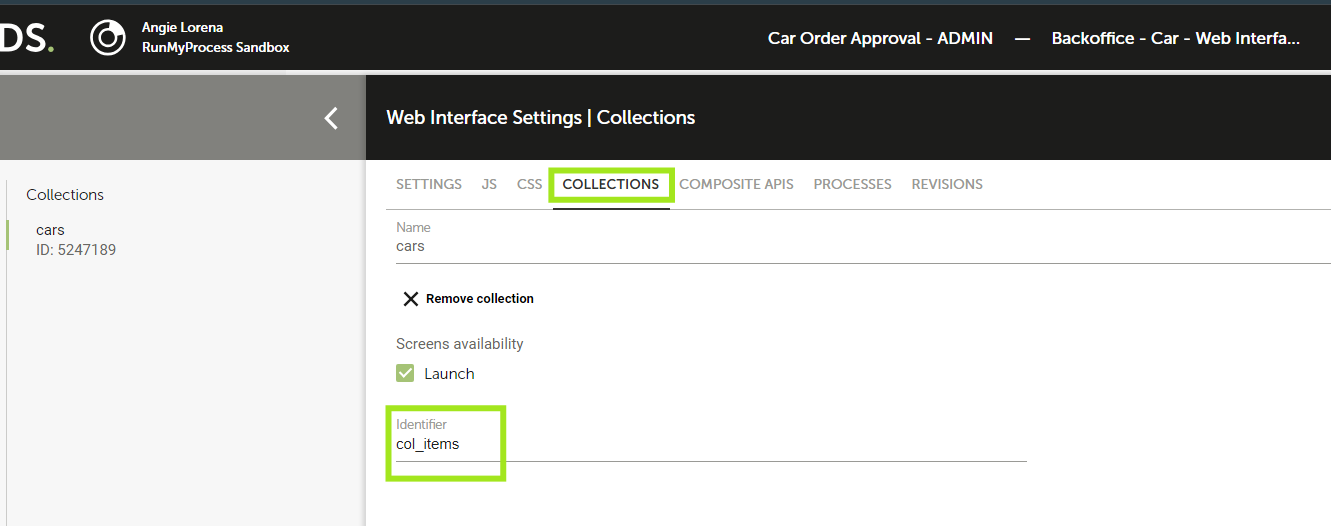
Switch to Collections tab, add collection cars and change its identifier to col_items
Then switch to Design tab:
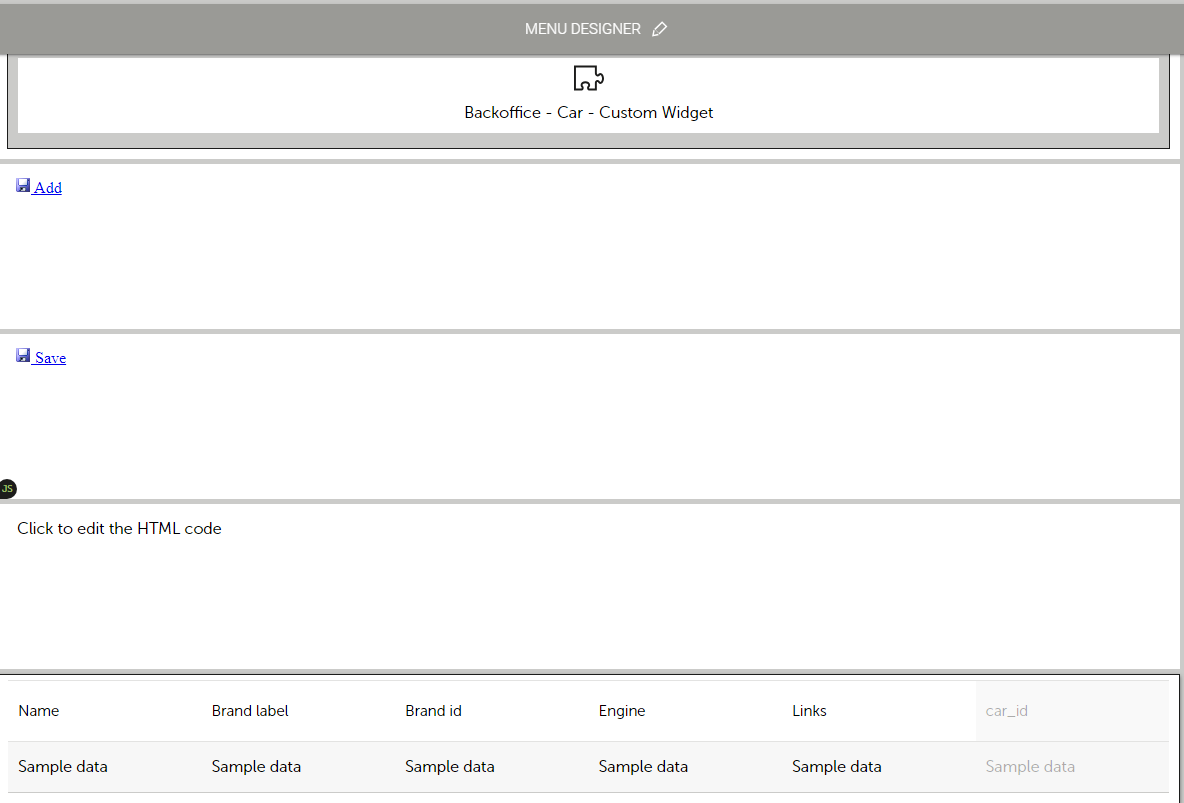
(1) Create a html widget with following code
<a href="#" onClick="javascript:clean_item();"> <img src="https://rmp-public.s3.amazonaws.com/public/icons/n_add.png"/> Add a new item</a>
It will display 'Add an item' link
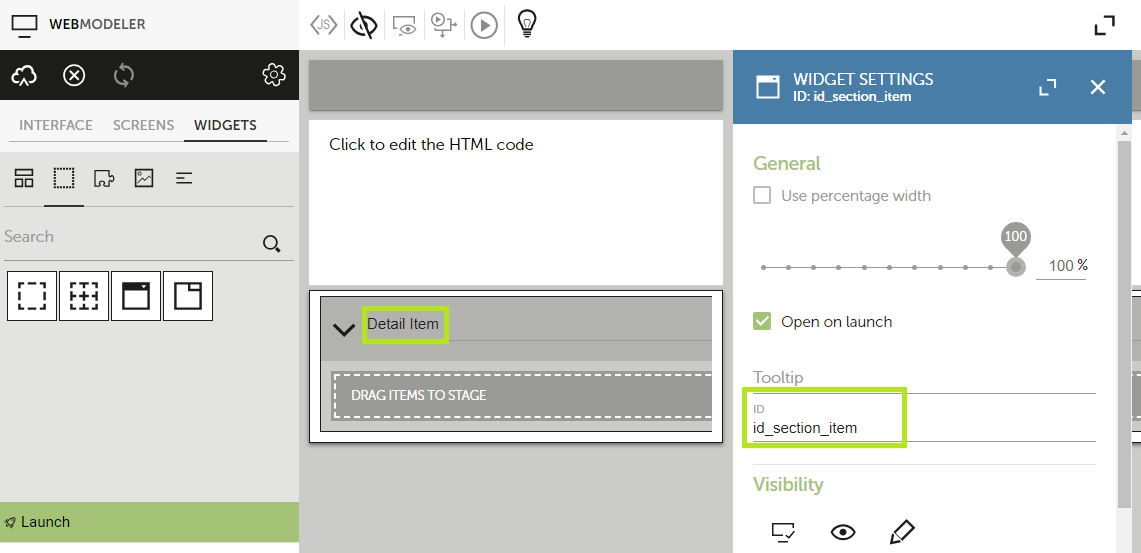
(2) Create a section widget
- Header: Detail Item
- Identifier: id_section_item
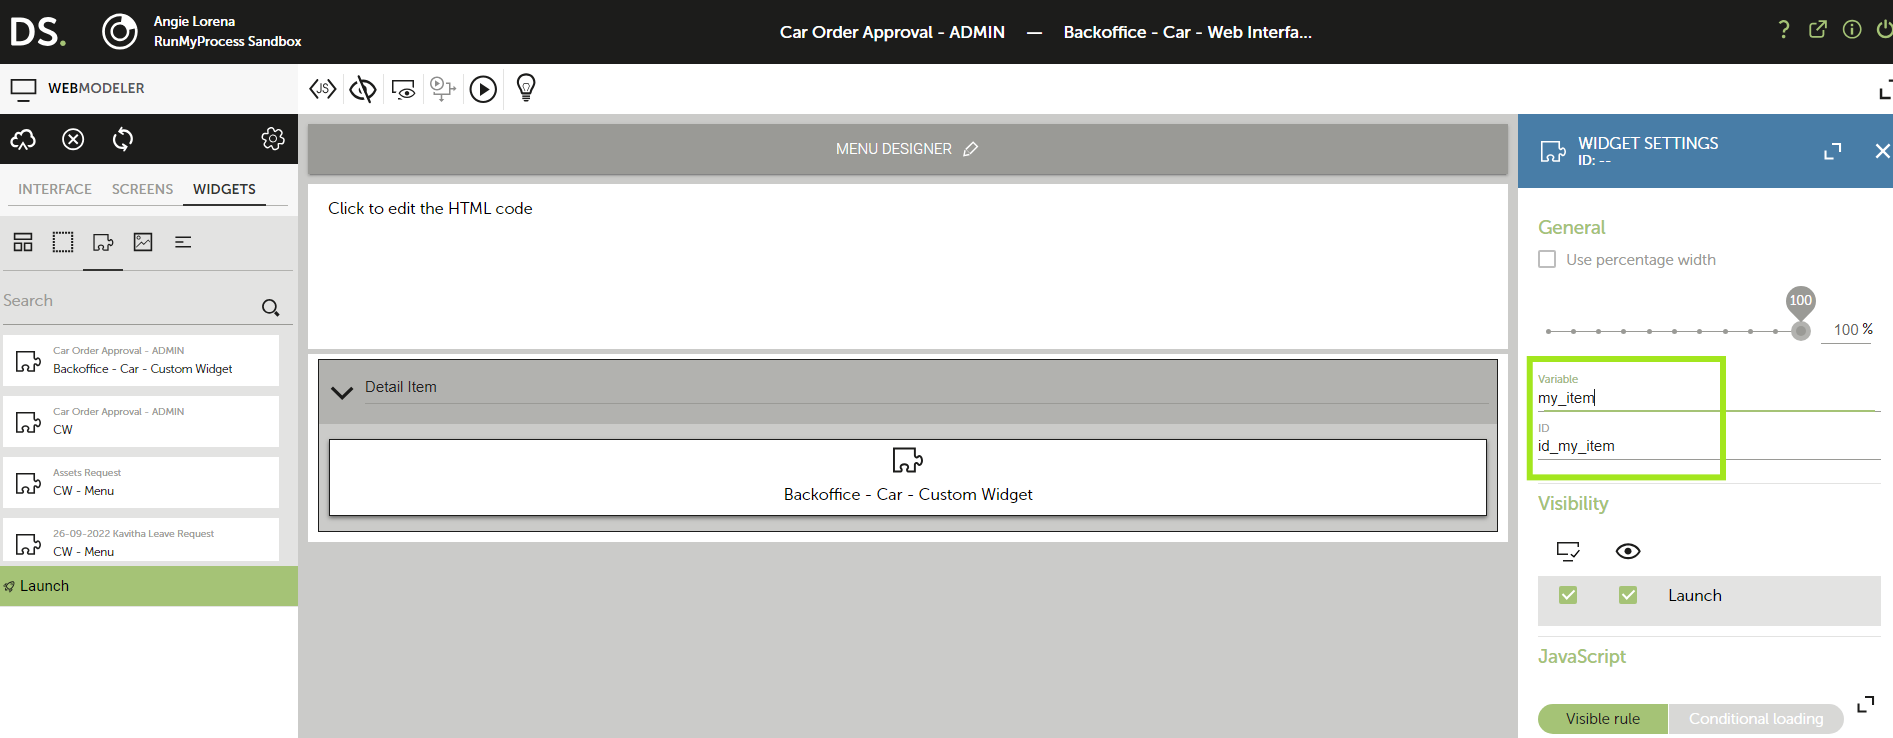
(3) In the section widget, include 'Backoffice - Car - Custom Widget' Custom widget
- Variable: my_item
- Identifier: id_my_item
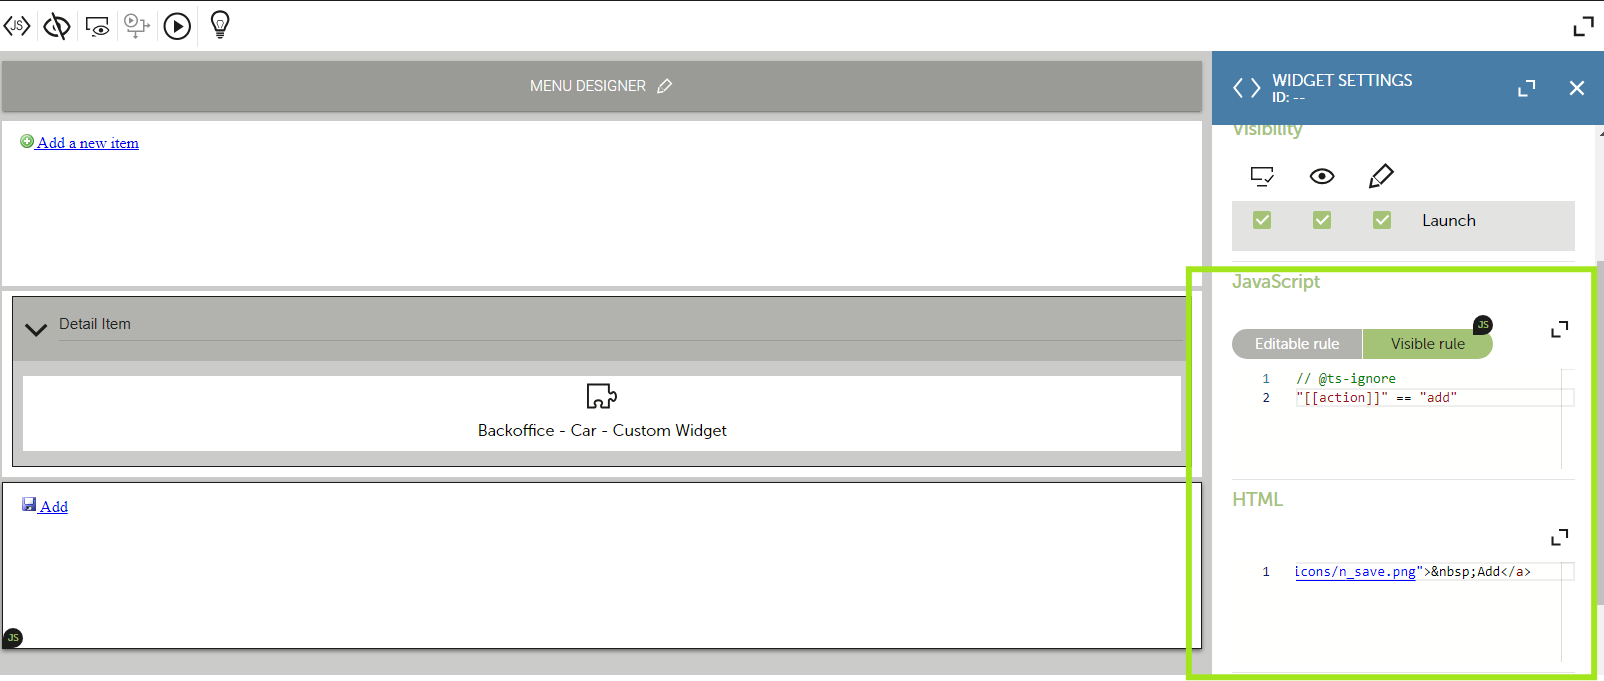
(4) Add a html widget with following code:
<a href="#" onClick="javascript:add_item();"><img src="https://rmp-public.s3.amazonaws.com/public/icons/n_save.png"> Add</a>
And add visibility rule "[[action]]" == "add"
It will display 'Add' action link.
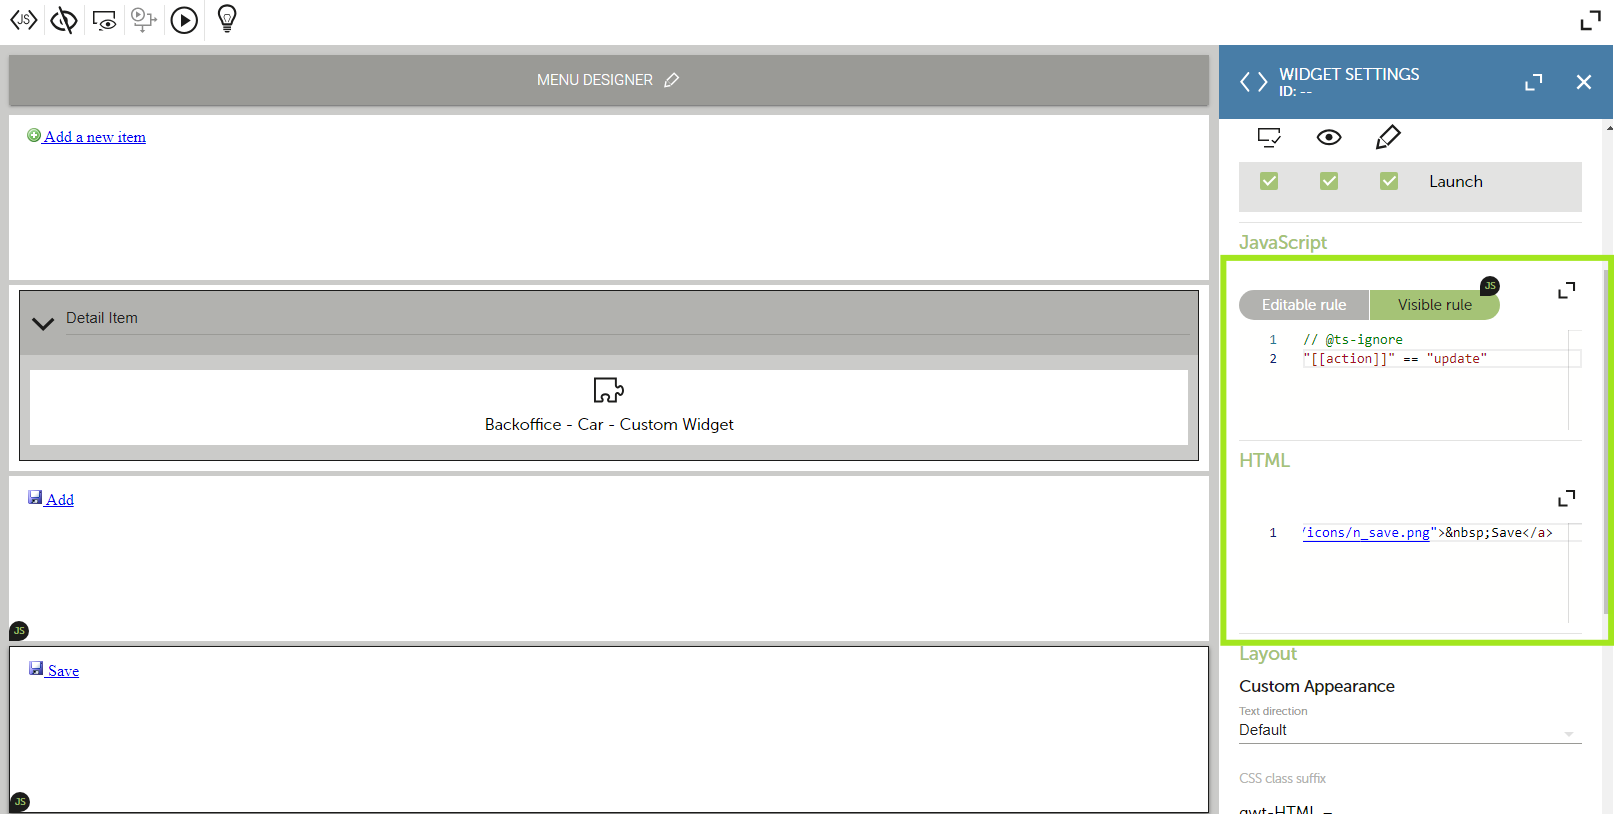
(5) Add a html widget with following code:
<a href="#" onClick="javascript:update_item();"><img src="https://rmp-public.s3.amazonaws.com/public/icons/n_save.png"> Save</a>
Add visibility rule "[[action]]" == "update"
It will display 'Save' action link
(6) Create a html widget
- Leave content as empty
- Identifier: id_html_msg
It will display information when item has been properly added, updated, deleted.
(7) Add a report widget over collection
- Choose collection 'cars'
- Identifier: id_report
Then configure the report:
Here's we choose what field of the items will be displayed as columns.
- Add property name | Header Name
- Add property brand_label | Header Brand label
- Add property brand_id | Header Brand id
- Add property engine | Header Engine
- Add property '' (leave empty)| Header Links
- Click on the page icon on row Links and enter the following code
This code will create two clickable icons for editing or deleting an item
"<a href=\"#\" onClick=\"javascript:load_item(\'" + "[[car_id]]" + "\');\"><img src=\"https://rmp-public.s3.amazonaws.com/public/icons/n_edit.png\"></a> <a href=\"#\" onClick=\"javascript:delete_item(\'" + "[[car_id]]" + "\');\"><img src=\"https://rmp-public.s3.amazonaws.com/public/icons/n_delete.png\"></a>";
car_id will have to be replaced by your own item id variable name.
This script will display 2 html links to edit an item (pen) and delete an item (red cross).
- Add property car_id | Header car_id
- Make the car_id column invisible
Note: to be able to use car_id value into other columns (ex: Links) you must create car_id column (but you can hide it).
(8) Create a hidden split widget
(9) Create a Javascript widget called 'JS def', within the previously created split widget, with following code:
function clean_item() {
    //empty supercar section to create a new one
    id_section_item.setVisible(true);
    id_section_item.open();
    RMPApplication.set("my_item", "{}");
    RMPApplication.set("action", "add");
}

//add car
function add_ok(result) {
    id_html_msg.setHtml("<font color='green'><i>Item added</font><i>");
    clean_item();
    id_report.refresh();
}

function add_ko(result) {
    //Error while adding item in the collection
    id_html_msg.setHtml("<font color='red'><i>Error while adding new item</font><i>");
}

function add_item() {
    var my_object = eval('(' + RMPApplication.get("my_item") + ')');
    if(!car_already_exists(my_object.name,my_object.brand_id)){
        my_object.car_id = RMPApplication.uuid();
        col_items.saveCallback(my_object, add_ok, add_ko);
    }else{
        id_html_msg.setHtml("<font color='red'><i>Car already exists!</font><i>");
    }
}

//udpate car
function update_ok(result) {
    id_html_msg.setHtml("<font color='green'><i>Item Saved</font><i>");
    clean_item();
    id_report.refresh();
}

function update_ko(result) {
    //Error while updating item in the collection
    id_html_msg.setHtml("<font color='red'><i>Error while saving item</font><i>");
}

function update_item() {
    var my_pattern = {};
    my_pattern.car_id = RMPApplication.get("my_item.car_id");
    var my_object = eval('(' + RMPApplication.get("my_item") + ')');
    col_items.updateCallback(my_pattern, my_object, update_ok, update_ko);
}

//load_car
function load_ok(result) {
    id_html_msg.setHtml("<font color='green'><i>Item loaded</font><i>");
    id_section_item.setVisible(true);
    id_section_item.open();
    RMPApplication.set("my_item", result[0]);
    RMPApplication.set("action", "update");
}

function load_ko(result) {
    id_html_msg.setHtml("<font color='red'><i>Error while loading item</font><i>");
    id_report.refresh();
}

function load_item(car_id) {
    var my_pattern = {};
    my_pattern.car_id = car_id;
    col_items.listCallback(my_pattern, {}, load_ok, load_ko);
}

//delete_car
function delete_ok(result) {
    id_html_msg.setHtml("<font color='green'><i>Item deleted</font><i>");
    id_report.refresh();
    //empty custom widget
    RMPApplication.set("my_item", "{}");
    RMPApplication.set("action", "add");
}

function delete_ko(result) {
    //Error while deleting item from the collection
    id_html_msg.setHtml("<font color='red'><i>Error while deleting item</font><i>");
}

function delete_item(car_id) {
    var my_pattern = {};
    my_pattern.car_id = car_id;
    var my_object = eval('(' + RMPApplication.get("my_item") + ')');
    col_items.removeCallback(my_pattern, delete_ok, delete_ko);
}

function exists_ok(result) {
    if(result[0]){
        res=true;
    }else{
        res=false;
    }
}

    function exists_ko(result) { }

function car_already_exists(name,brand_id){
    var my_pattern = {};
    my_pattern.name = name;
    my_pattern.brand_id = brand_id;
    var options = {};
    options.asynchronous = false;
    res=false;
    col_items.listCallback(my_pattern, options, exists_ok, exists_ko);
    return res;
}
Save your web interface and preview it.
You're done, give it a try!